一、CentOS 7.x 安装Docker-ce社区版本
https://www.osyunwei.com/archives/11592.html
二、构建Nginx容器镜像
1、准备软件包
cd /usr/local/src #建议先把需要安装的软件包下载到本地目录
wget http://nginx.org/download/nginx-1.21.1.tar.gz #nginx
wget http://ftp.pcre.org/pub/pcre/pcre-8.44.tar.gz #nginx扩展
wget https://www.openssl.org/source/openssl-1.1.1k.tar.gz #nginx扩展
wget http://www.zlib.net/zlib-1.2.11.tar.gz #nginx扩展
2、从docker hub拉取构建所需要的基础系统镜像
#我们用centos系统进行构建
https://hub.docker.com/_/centos?tab=tags&page=1&ordering=last_updated
选择centos:7.9.2009版本

docker pull centos:7.9.2009 #拉取系统镜像
docker image ls #查看docker镜像
docker run -itd --name centos7.9 centos:7.9.2009 #运行容器
docker ps #查看容器
[root@master01 opt]# docker ps
CONTAINER ID IMAGE COMMAND CREATED STATUS PORTS NAMES
adc6473335ee centos:7.9.2009 "/bin/bash" 48 seconds ago
docker exec -it adc6473335ee /bin/bash #进入容器
exit #退出容器
3、编写Dockerfile构建文件
cd /usr/local/src #进入目录
vi /usr/local/src/dockerfile #dockerfile文件必须和上一步下载的软件包在同一目录
#基于这个镜像进行操作
FROM centos:7.9.2009
#作者和邮箱
MAINTAINER osyunwei osyunwei@osyunwei.com
#指定容器里面的路径,为后面的RUN、CMD或者ENTERPOINT操作指定目录
WORKDIR /usr/local/src
#RUN镜像操作指令
#设置时区
RUN \cp /usr/share/zoneinfo/Asia/Shanghai /etc/localtime && echo 'Asia/Shanghai' >/etc/timezone && echo 'Zone=Asia/Shanghai' >/etc/sysconfig/clock
#安装依赖包
RUN yum install -y pcre pcre-devel autoconf automake bzip2 bzip2* gcc gcc-c++ gtk+-devel gettext gettext-devel glibc make mpfr openssl openssl-devel patch pcre-devel perl zlib-devel
#将本地的一个文件或目录拷贝到容器的某个目录里
COPY nginx-1.21.1.tar.gz pcre-8.44.tar.gz openssl-1.1.1k.tar.gz zlib-1.2.11.tar.gz ./
#解压软件包
RUN ls *.tar.gz | xargs -n1 tar xzvf
#安装pcre
WORKDIR /usr/local/src/pcre-8.44
RUN ./configure --prefix=/usr/local/pcre && make && make install
#安装openssl
WORKDIR /usr/local/src/openssl-1.1.1k
RUN ./config -fPIC shared zlib --prefix=/usr/local/openssl && make && make install
#安装zlib
WORKDIR /usr/local/src/zlib-1.2.11
RUN ./configure --prefix=/usr/local/zlib && make && make install
#安装Nginx
WORKDIR /usr/local/src/nginx-1.21.1
#创建nginx运行用户和组
RUN groupadd www && useradd -g www www -s /bin/false
#安装nginx
RUN ./configure --prefix=/usr/local/nginx --without-http_memcached_module --user=www --group=www --with-http_stub_status_module --with-http_ssl_module --with-http_gzip_static_module --with-openssl=/usr/local/src/openssl-1.1.1k --with-zlib=/usr/local/src/zlib-1.2.11 --with-pcre=/usr/local/src/pcre-8.44 && make && make install
#切换到根目录
WORKDIR /root
#清理安装包
RUN rm -rf /usr/local/src/* && yum clean all
#配置nginx以www用户和组运行
RUN sed -i "1iuser www www;" /usr/local/nginx/conf/nginx.conf
#设置nginx运行端口
EXPOSE 80/tcp 443/tcp
#设置nginx以foreground前台方式运行
CMD ["/usr/local/nginx/sbin/nginx", "-g", "daemon off;"]
:wq! #保存退出
4、构建容器
docker build -t osyunwei/nginx:1.21.1 /usr/local/src
或者
docker build -t osyunwei/nginx:1.21.1 .
#docker程序会在当前目录寻找dockerfile文件
......
......
Removing intermediate container 052c1d5691d6
---> 8dd6c7e4e217
Step 20/20 : CMD ["/usr/local/nginx/sbin/nginx", "-g", "daemon off;"]
---> Running in 85985452c249
Removing intermediate container 85985452c249
---> eb11f99b01d1
Successfully built eb11f99b01d1
Successfully tagged osyunwei/nginx:1.21.1
[root@master01 src]#
5、运行容器
docker run --name nginx -it -d -p 80:80 osyunwei/nginx:1.21.1
docker ps #查看容器
[root@master01 src]# docker ps
CONTAINER ID IMAGE COMMAND CREATED STATUS PORTS NAMES
0d333824c699 osyunwei/nginx:1.21.1 "/usr/local/nginx/sb…" 7 seconds ago Up 6 seconds 0.0.0.0:80->80/tcp, 443/tcp nginx
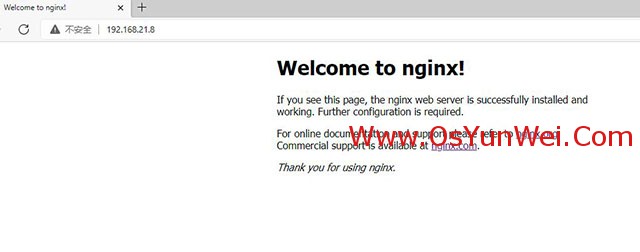
打开http://192.168.21.8/可以看到nginx已经运行
docker exec -it 0d333824c699 /bin/bash #进入容器
exit #退出容器
6、上传Nginx容器镜像到阿里云容器仓库
docker image ls #查看镜像id
[root@master01 src]# docker image ls
REPOSITORY TAG IMAGE ID CREATED SIZE
osyunwei/nginx 1.21.1 eb11f99b01d1 32 minutes ago 1.12GB
6.1重命名镜像标签
docker tag eb11f99b01d1 registry.cn-hangzhou.aliyuncs.com/osyunwei/nginx:1.21.1
#registry.cn-hangzhou.aliyuncs.com是阿里云容器仓库地址
#osyunwei是自己创建的命名空间
#nginx是自己创建的仓库名称
#:1.21.1是自定义nginx镜像的版本号
#登录阿里云网站-容器镜像服务
https://cr.console.aliyun.com/cn-hangzhou/instances
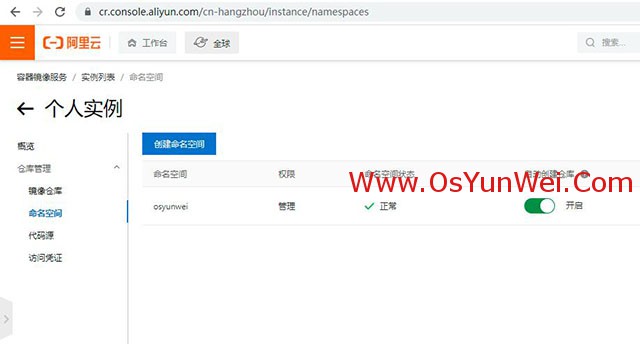
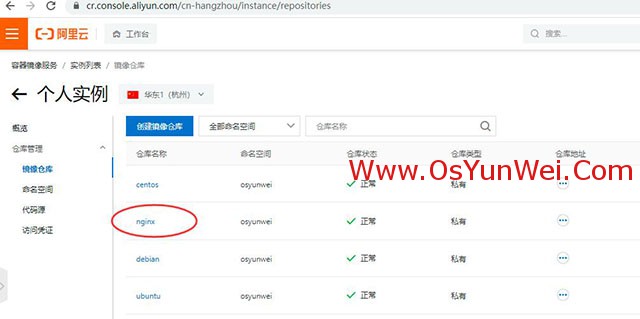
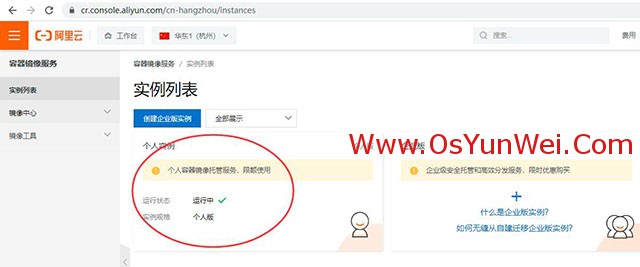
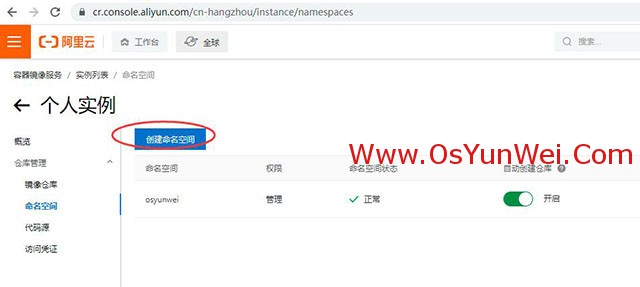
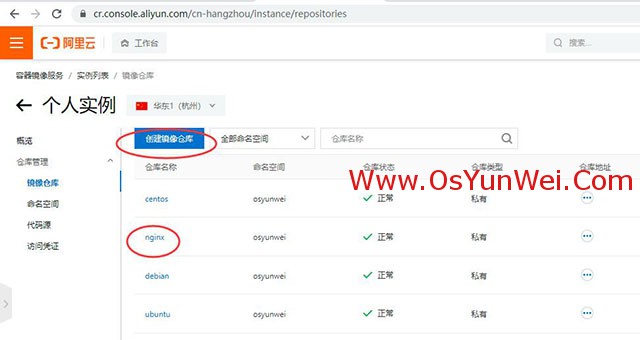
仓库管理-创建命名空间和仓库镜像
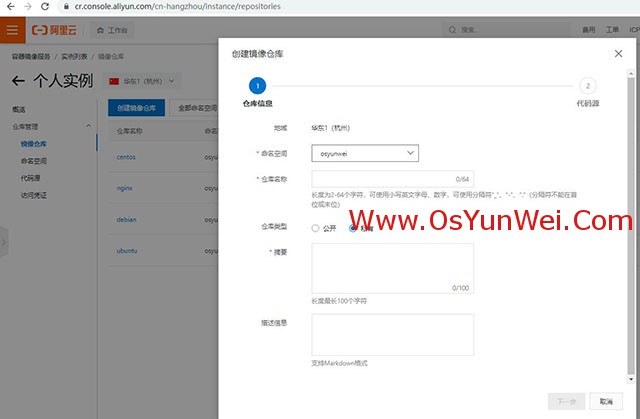
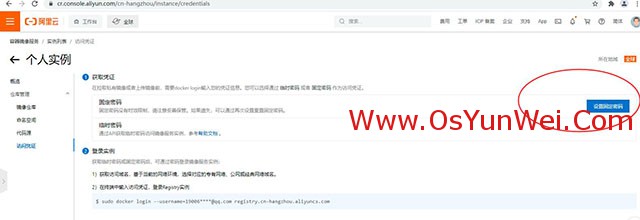
访问凭证-获取凭证-设置固定密码
#这个密码是登录阿里云仓库的密码,不是登录阿里云网站的密码
6.2登录阿里云仓库
docker login --username=你的阿里云登录账号 registry.cn-hangzhou.aliyuncs.com
[root@master01 src]# docker login --username=你的阿里云登录账号 registry.cn-hangzhou.aliyuncs.com
Password:刚才设置的固定密码
WARNING! Your password will be stored unencrypted in /root/.docker/config.json.
Configure a credential helper to remove this warning. See
https://docs.docker.com/engine/reference/commandline/login/#credentials-store
Login Succeeded
[root@master01 src]#
#登录成功后
6.3上传镜像到阿里云仓库
docker push registry.cn-hangzhou.aliyuncs.com/osyunwei/nginx:1.21.1
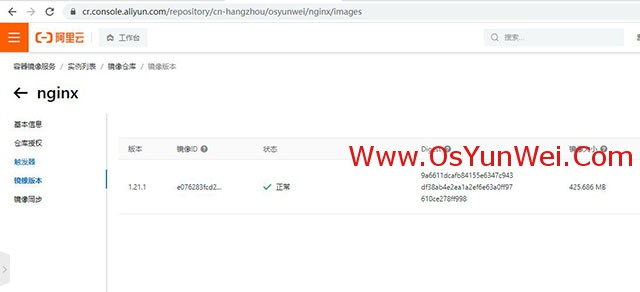
6.4查看阿里云容器镜像
可以看到当前镜像的镜像层信息,基于Dockerfile构建的容器镜像是透明的,每一步操作都有记录
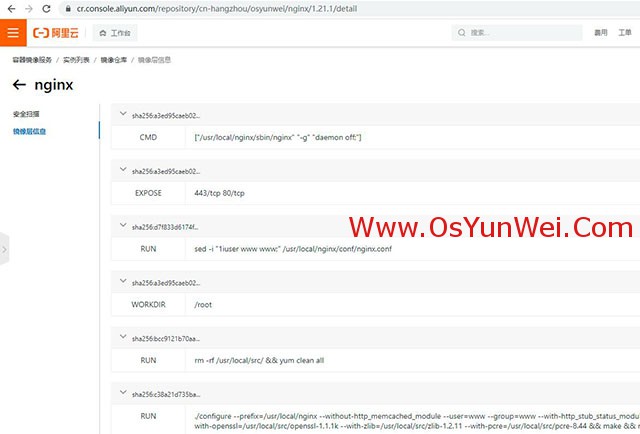
6.5拉取阿里云容器镜像
docker pull registry.cn-hangzhou.aliyuncs.com/osyunwei/nginx:1.21.1
扩展阅读:
#登陆到Docker Hub仓库
#由于Docker Hub官方仓库访问太慢,不建议把容器镜像放在上面
#hub.docker.com 是 Docker Hub 网站,不是登录地址
#docker的登录地址是index.docker.io
[root@master01 src]# docker login index.docker.io
Username: qihang01
Password:
WARNING! Your password will be stored unencrypted in /root/.docker/config.json.
Configure a credential helper to remove this warning. See
https://docs.docker.com/engine/reference/commandline/login/#credentials-store
Login Succeeded
[root@master01 src]#
至此,Docker下使用Dockerfile构建Nginx容器镜像教程完成。

 ②190706903
  ③203744115

